Learn the CRM the same way you use it: one screen at a time.
This guide is designed for Acquira team members who need a clear, visual, low-friction guide. It reads like a product tour, not a technical manual.
Who This Is For
New CRM Users Agents, operators, and teammates who need practical guidance for day-to-day CRM work.How to Use This Guide
Read + Click + Follow Use the sidebar to move section by section. Each screenshot is paired with clear notes on what to click and what to notice first.1. Logging Into the CRM
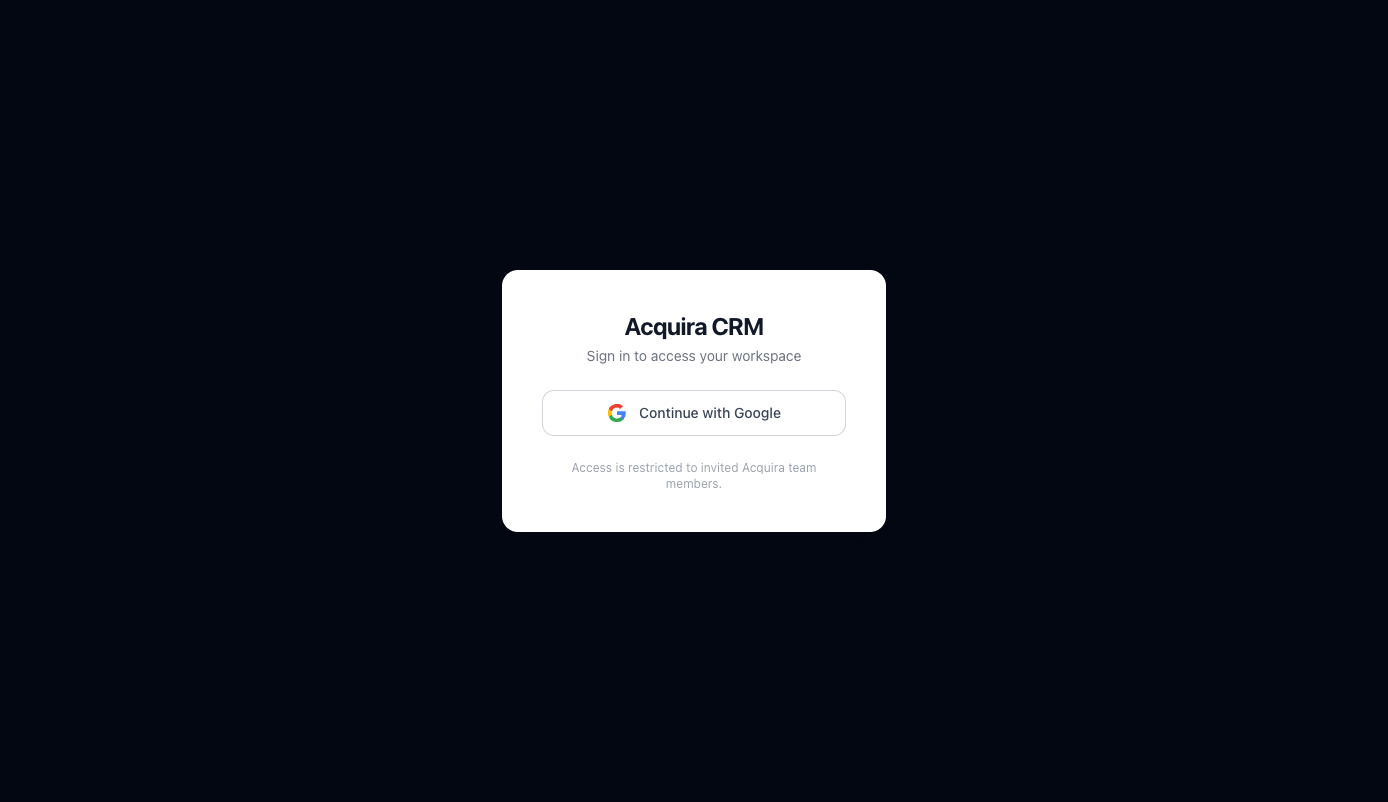
Start here when someone is opening the CRM for the first time.
What the user should expect
- Go to crm.acquira.co.
- Sign in with the approved Google account.
- If access has been granted, the user lands in the CRM dashboard.
- If access fails, the user should contact an admin for an invite.
What to point out on this screen
- The only action most users need is Continue with Google.
- The login card stays simple on purpose. If a user is blocked here, it is usually an access issue, not a navigation issue.
- A successful sign-in should move the user into the main CRM workspace right away.
- Point out where the user clicks to sign in.
- Call out that only approved Google accounts can access the CRM.
- Show what “successful login” looks like.
If someone cannot enter, the fastest check is whether their Google account has already been invited into the CRM.
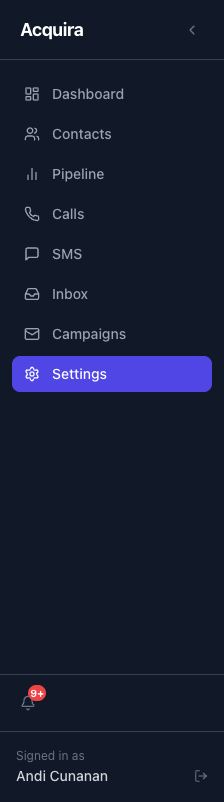
2. Navigating the Dashboard
The dashboard gives the team a quick pulse on contacts, calls, pipeline movement, and source trends.
Use the Contacts and Calls toggle
Switch between contact-focused metrics and call-focused metrics without leaving the page.
Choose a time view
Use This Week, This Month, or Custom depending on what you need to review.
Review the summary cards first
These cards answer the fastest questions: how many new contacts came in, how many calls were made, and how performance changed from the prior period.
Use the charts for deeper context
Charts show where contacts sit in the pipeline, which agents own them, and what marketing sources are producing inbound leads.
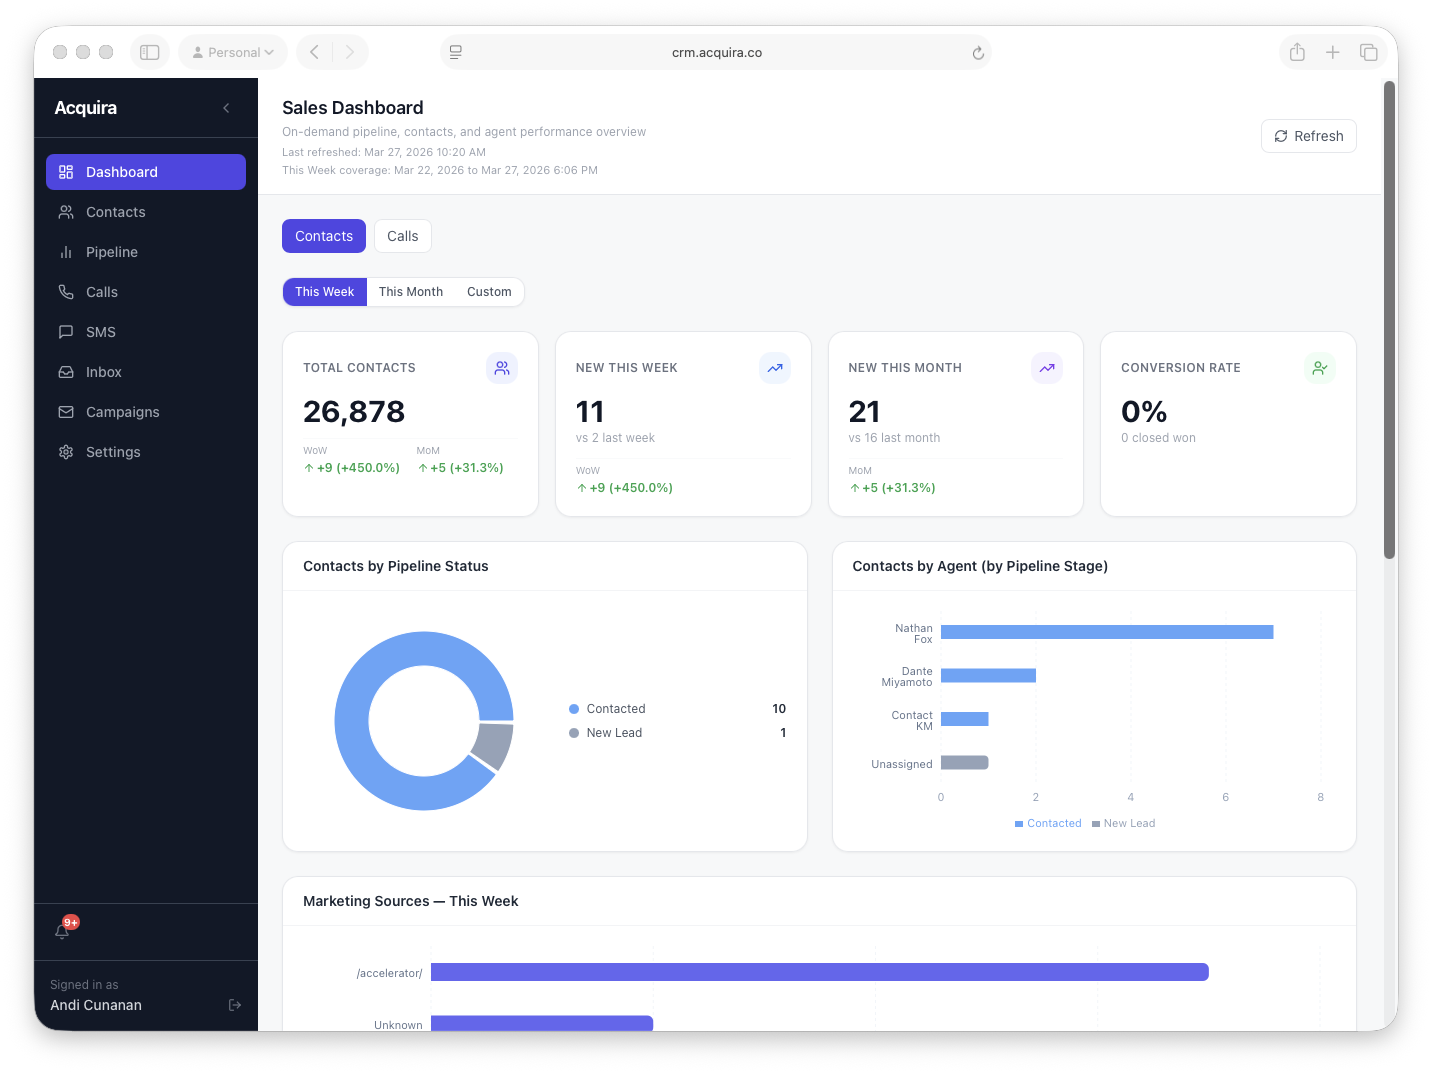
What to notice first
- Start with the top toggle so you know whether you are reviewing Contacts or Calls.
- Check the time buttons next. They change the whole story the dashboard is telling.
- Read the summary cards before the charts. The cards answer the quickest operational questions.
3. Working in Contacts
Contacts is the main workspace for searching leads, reviewing activity, updating ownership, and opening day-to-day communication actions.
Find a contact and understand the table
Open a contact and review activity
Update key fields
Assign selected contacts to an existing campaign
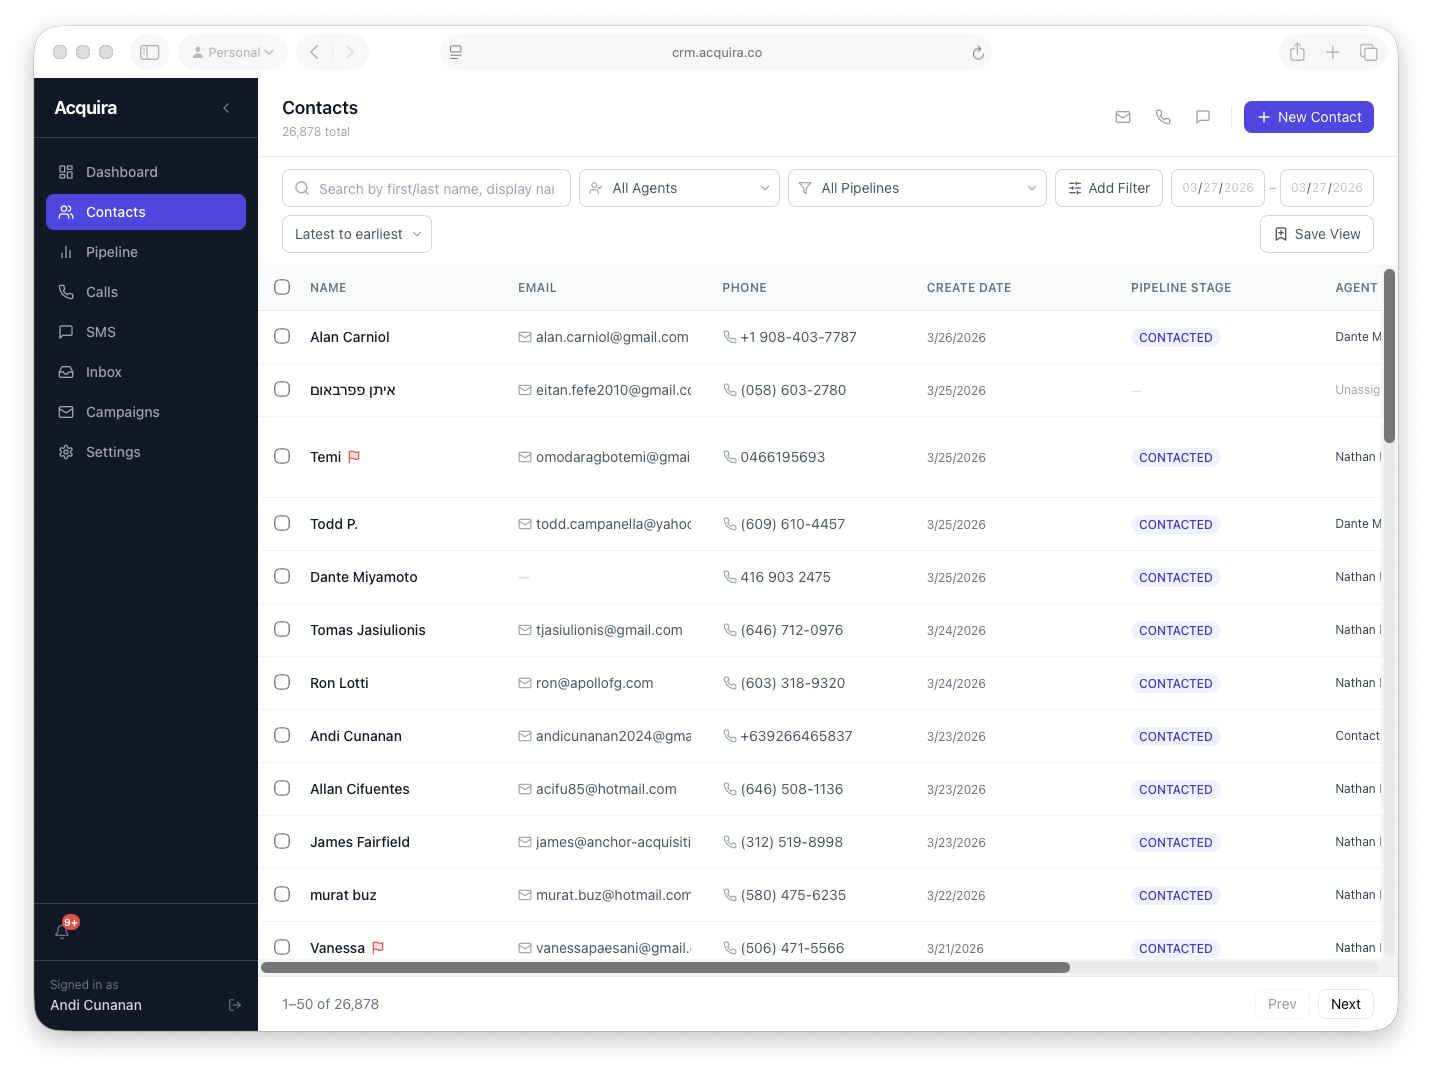
- Show search, agent filter, pipeline filter, and date filters.
- Point out the note flag after the contact name.
- Highlight bulk actions such as assign, campaign, merge, and delete.
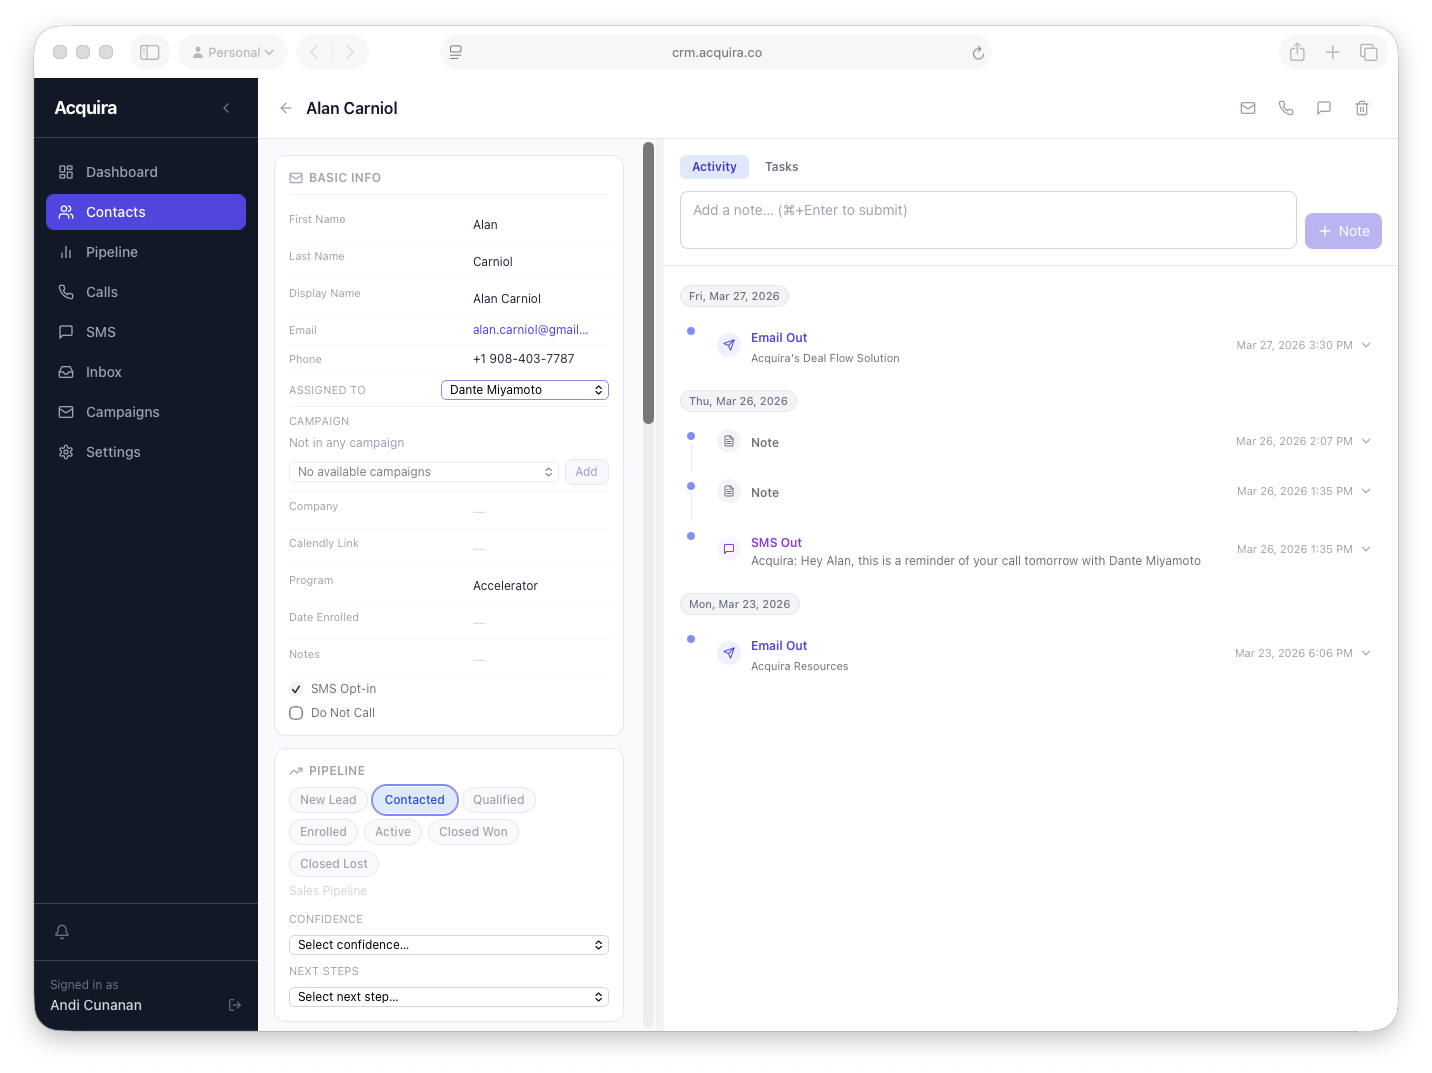
- Show where assignment and pipeline stage are updated.
- Highlight where SMS opt-in, notes, and activity history live.
- Point out quick actions for email, call, and SMS.
Use the list view to find the right person, then do the actual work from the contact record where the full activity history and quick actions are visible together.
4. Creating and Managing Campaigns
The Campaigns workspace is split by channel so the team can create Email campaigns with Resend-backed metrics and SMS campaigns with Twilio-backed delivery, reply, and opt-out controls.
Create the campaign in the right channel tab
Use the left sidebar to open Campaigns, choose Email or SMS, then create the campaign with a clear internal name and message body. For email, use Save Email Campaign to save the draft.
Set the schedule if needed
Leave the schedule blank to keep the campaign ready for manual send, or set a future date and time in America/New_York so the campaign moves into the scheduled queue.
Build or assign the audience
Use saved Contact filters, bulk add-to-campaign, or available campaign audience tools to add the intended recipients. For email, unsubscribe and suppression rules should block unsafe contacts. For SMS, phone number and opt-in eligibility are required.
Use the campaign page for one-by-one adds if needed
If you need to add a single extra contact, expand the campaign row and use the recipient search there instead of going back through bulk selection.
Review send readiness and metrics expectations
Email campaign detail shows the recipient email preview, Campaign Readiness, Test Send, Campaign Health, Clicked Links, Geography, and Recipients. Sender Health and Open/Read Trends live on the Email Campaigns tab. SMS metrics separate accepted, delivered, failed, replies, opt-outs, and sender usage. Approval is removed. Hard caps, readiness checks, and reputation guardrails control campaign sending.
Create the campaign in the correct channel tab, confirm the eligible audience, send a test email when using email, then review the campaign metrics after provider events arrive.
5. Sending SMS Messages
Agents can send one-to-one SMS from a contact record while the CRM keeps a full activity trail.
Simple sending flow
- Open the contact.
- Click the SMS action.
- Write or insert a template.
- Review the message for brand clarity and next step.
- Send.
What users should know
- The sent message is logged in Activity as SMS Out.
- Replies appear as SMS In.
- Keyword replies like STOP and START are handled by Twilio, while the CRM logs and mirrors the consent change.

After an SMS goes out, the most important check is that it appears in Activity. That confirms the message is now part of the contact’s working history.
6. Viewing and Managing Saved Views
Saved views help the team return to repeatable working lists without rebuilding filters every time.
Where to find them
Saved views live in the permanent left sidebar section below Settings. They are grouped by Contacts and Pipeline when those groups contain saved items.
How to use them
Click a saved view to jump directly into that filter setup and continue working from the same slice of data.
Why they matter
They reduce repetitive setup and help agents work consistently across lead queues, follow-up lists, and pipeline groups.
- Show where a user clicks a saved view.
- Show how the active view is visually indicated.
- Show where empty groups disappear when no saved views exist.
Saved Views work best when each team member reuses the same few working lists instead of building one-off filters every day.
7. Creating and Using Message Templates
Templates make outreach faster and more consistent across the team.
Open Settings → Templates
This is where the team manages reusable email and SMS templates, saved links, and signatures.
Create the template body
Write the message clearly, using the same language the team would use in real outreach.
Add a saved hyperlink or signature
Use the dropdown and modal tools to insert reusable links or signatures instead of rebuilding them from scratch.
Save and use in outreach
Agents can then use the template during email or SMS composition to speed up follow-up.
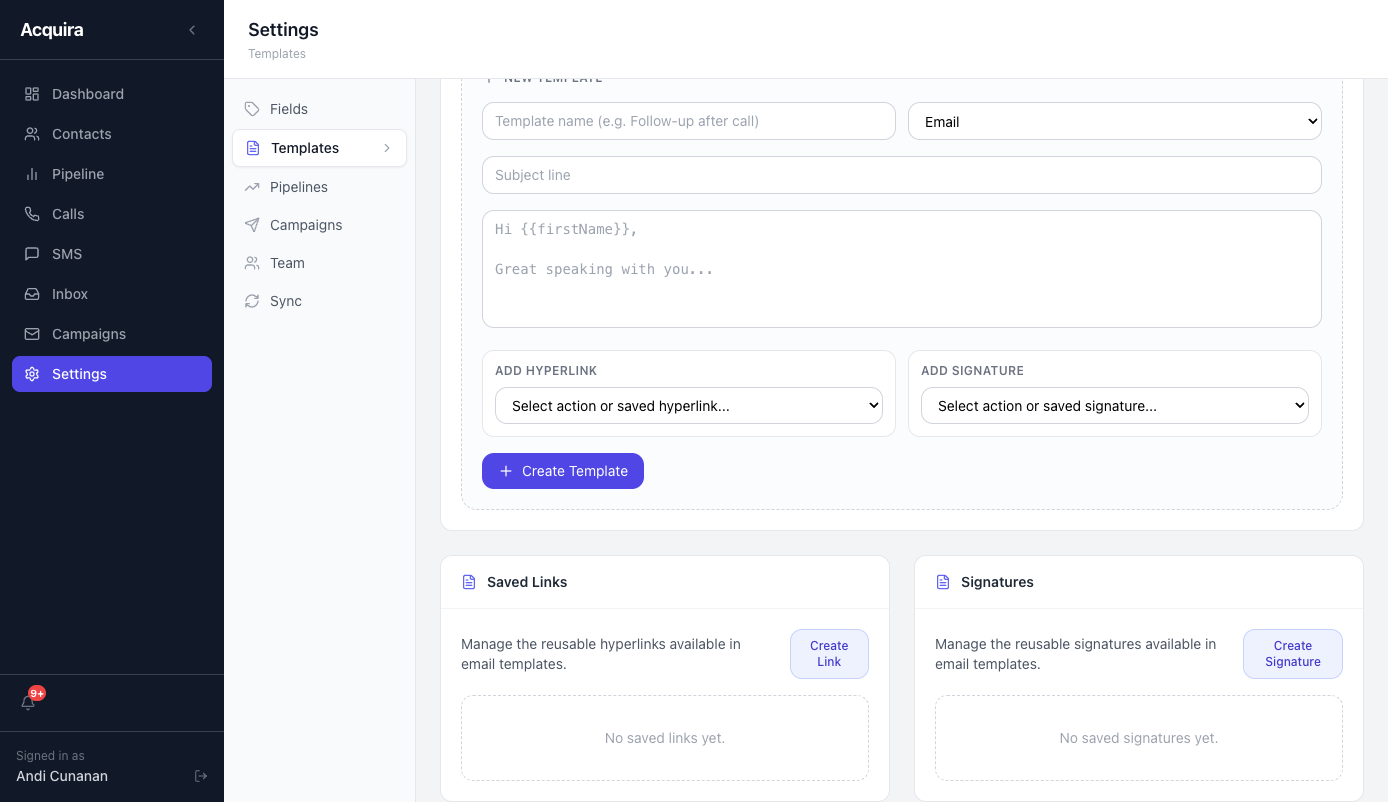
- Show where a user names the template and chooses Email or SMS.
- Point out the body editor where reusable copy is written.
- Highlight the Create Template button as the final save step.
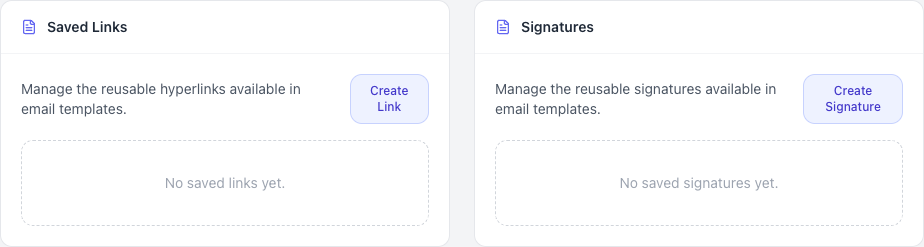
- Show the Create Link action for reusable URLs.
- Show the Create Signature action for reusable sign-offs.
- Explain that these save time by keeping common assets in one place.
8. Monitoring Airtable Sync Health
The CRM now includes a dedicated Sync view in Settings so the team can quickly confirm whether Airtable lead sync is healthy.
Open Settings → Sync
This is the first place to check when a new Airtable lead does not appear in the CRM as expected.
Read the health badge and warning banner
The Sync view now calls out risky states like expiring webhooks, stale notifications, lookup failures, or missing realtime configuration.
Check the latest Airtable notification and webhook sync
The key signals are the last Airtable notification time, webhook expiration time, and the latest realtime sync processed by the CRM.
Use recent realtime logs for fast troubleshooting
The bottom of the Sync view shows recent WEBHOOK and WEBHOOK_SYNC entries so teammates can quickly tell whether notifications are landing and being processed.
A healthy sync setup shows no warning banner, a recent Airtable notification, and a recent realtime sync entry. If the warning banner appears, use that guidance before trying manual sync commands.
9. Essential Daily Actions
This is the short version of how most team members will use the CRM in a normal day.
| Goal | Where to go | What to do |
|---|---|---|
| Review inbound activity | Dashboard, Inbox, SMS | Check new contacts, messages, and recent conversations. |
| Work assigned leads | Contacts or Pipeline | Open the saved view or filter set you use most often and begin follow-up. |
| Send outreach | Contact detail | Send SMS or email, then confirm the activity appears in the timeline. |
| Build a campaign audience | Campaigns and Contacts | Create the campaign in Campaigns first, then assign the selected contact set to it from the Contacts tab. |
| Move a lead forward | Contact detail or Pipeline | Update pipeline stage, confidence, next steps, and assignment. |
| Keep lists organized | Saved Views | Use and maintain saved views so the team can return to working lists quickly. |
Most team members will return to the same rhythm: review the dashboard, open a saved view, work the contact record, send outreach, and confirm the timeline reflects what happened.